Learn how to create seamless whiteboard magic effects with practical production steps, from pre-production planning to editing, using simple tools and smart shooting techniques.
This article helps video producers and marketers decide how to plan and shoot whiteboard magic effects that look polished without complex VFX software.
Why Planning is Key to Whiteboard Magic Effects
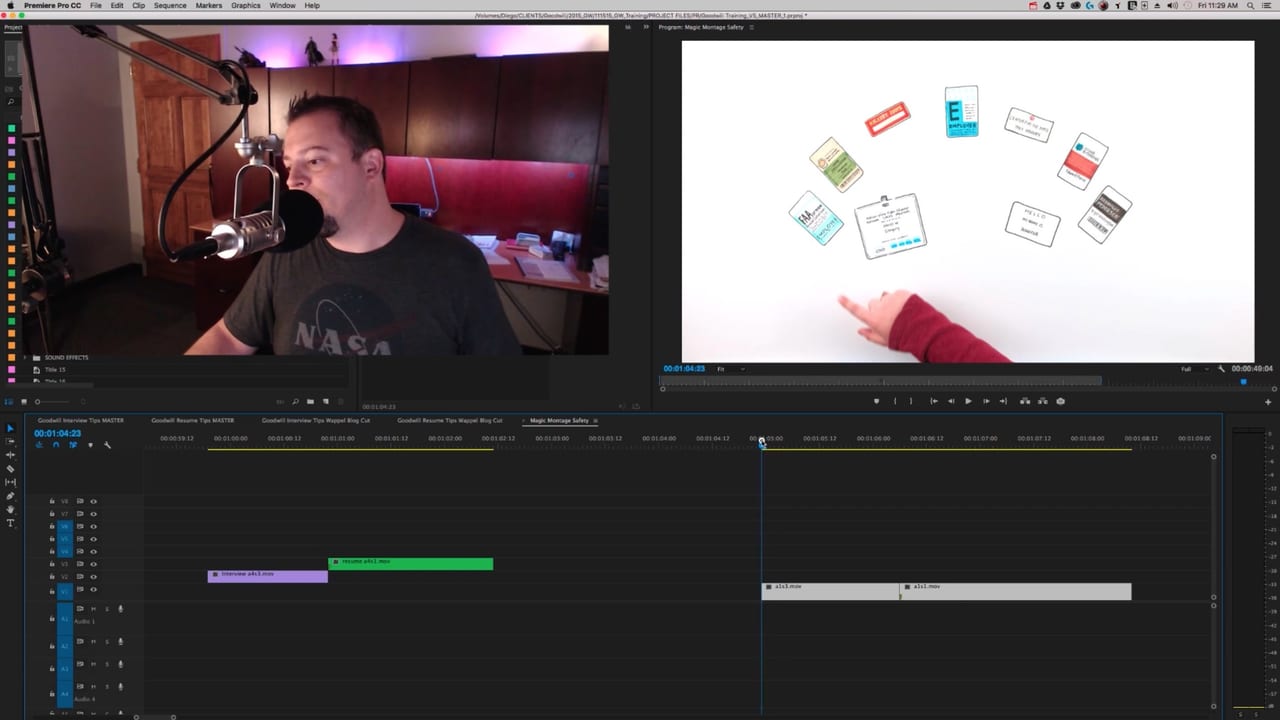
Creating a convincing whiteboard magic effect isn’t about expensive software or complicated post-production tricks. It’s about smart planning on set and precise execution during shooting. Locking your camera in place and mapping out your action before you shoot sets the foundation for a seamless effect. This means tracing the object lightly on the whiteboard where it will appear, then capturing two key passes: one with the real object interacting with the talent, and one with the drawn version. The magic happens in the edit when these clips are cut together perfectly.
Step-by-Step Production Workflow for Whiteboard Magic
Start by locking your camera on a tripod to ensure no movement between takes. Next, lightly trace the object on the whiteboard with pencil—this guide must be almost invisible on camera but visible enough for talent and crew. Shoot the first pass with the real item and the talent performing the action, capturing multiple takes for safety. Then, have an artist draw the object in bold ink over the traced outline. Finally, shoot the talent mimicking the same action but interacting with the drawn version instead of the real object. This two-pass shooting creates the raw footage needed for a smooth transition in editing.
Editing Tips to Sell the Illusion
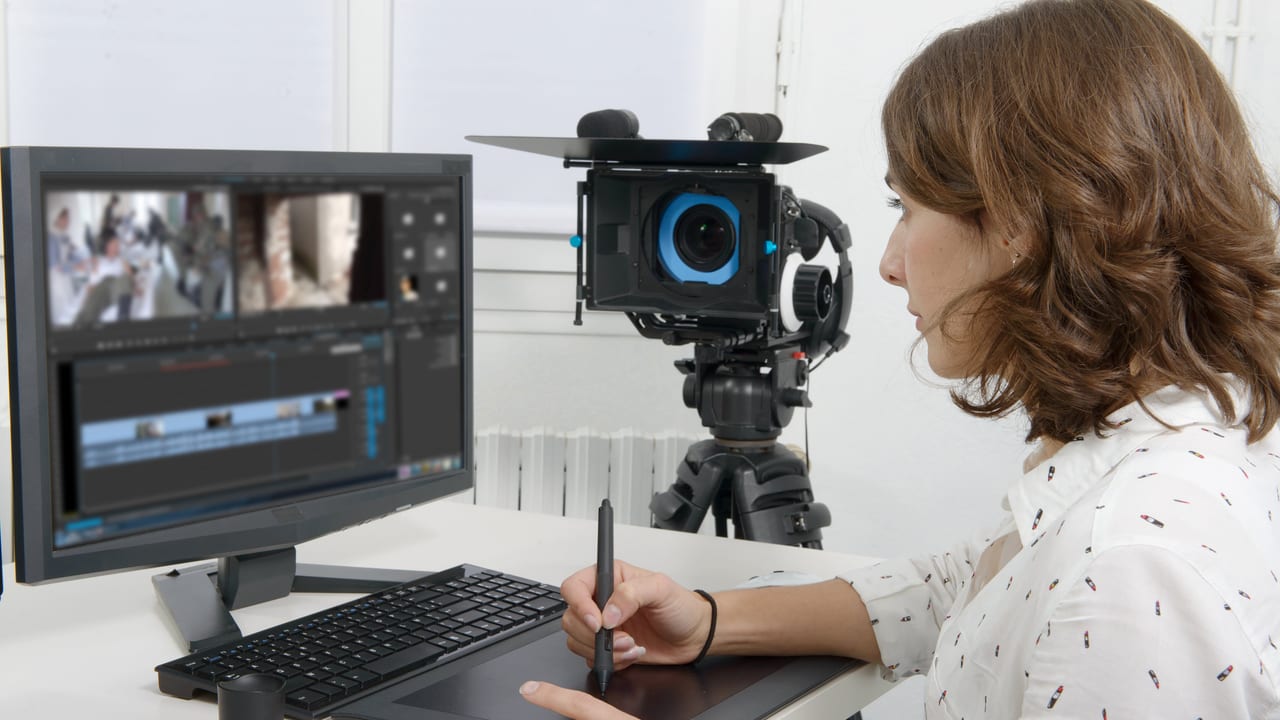
In post-production, the key is finding the exact cut point where the talent’s hand movement aligns perfectly between the real object and the drawing. Motion blur is your friend here; shooting with a shutter speed that captures natural blur during fast hand movements helps disguise the cut. Using straightforward editing software like Adobe Premiere, you can splice the two clips seamlessly. No need for complex compositing—just precise timing and a steady camera. Color grading and sound design can further enhance the effect, making the drawn object feel like it magically comes to life.
Common Challenges and How to Avoid Them
The biggest challenge is camera movement. Even slight shifts ruin the alignment and force you to reshoot. Use a sturdy tripod and avoid touching the camera once locked. Another pitfall is the visibility of the pencil tracing. Adjust your lighting and camera exposure to keep the tracing faint but visible to talent. Also, ensure the talent’s hand motion is consistent between takes—multiple rehearsals and takes help nail this. Finally, plan for motion blur by encouraging fast, fluid hand movements to mask the cut.
Bringing Whiteboard Magic to Your Brand Videos
Whiteboard magic effects add a playful, engaging layer to brand storytelling, especially for explainer videos, product demos, or campaign content. They convey creativity and hands-on craftsmanship without the need for heavy VFX budgets. At ECG Productions, we’ve helped clients integrate these effects smoothly into their video projects by combining strategic pre-production planning, on-set artistry, and efficient post workflows. Explore our portfolio to see how whiteboard magic can elevate your next video and contact us to discuss how we can bring this effect to your story.
FAQ
Do I need special VFX software to create whiteboard magic effects?
No, you can achieve convincing whiteboard magic effects using basic editing software like Adobe Premiere, as long as you plan your shots carefully and shoot multiple takes with a locked camera.
How do I ensure the pencil tracing isn’t visible on camera?
Use a very light pencil for tracing and adjust your camera exposure and lighting to blow out the tracing so it’s invisible on the footage but still visible to the talent during shooting.
What shutter speed should I use to capture motion blur for this effect?
A shutter speed that allows natural motion blur during fast hand movements—typically around 1/50 to 1/60 of a second for 24fps footage—helps disguise cuts and creates a smooth transition between clips.
What should a team understand about VFX Tutorial - How to Shoot a Whiteboard Magic Effect?
The useful takeaway is how audience, creative direction, production choices, post-production, approvals, and delivery needs shape the final video plan.
Where should this kind of project start?
Start with the goal, audience, deadline, where the finished piece needs to live, and the practical constraints that will affect creative and production decisions.
How can ECG help with the next step?
ECG can help connect the creative idea to production planning, filming, post-production, versioning, and delivery so the finished work fits the channel and the audience.