Learn how to produce dynamic 3D outlines in After Effects using the Element 3D plugin, enabling flexible camera movement and clean visual storytelling for your motion graphics
This article helps video producers and motion designers decide how to create flexible, dynamic 3D outlines in After Effects to enhance their animation and explainer videos.
Why Use Dynamic 3D Outlines in Your Motion Graphics?
Outlines are a powerful visual tool in motion graphics — they simplify complex shapes, emphasize form, and guide viewer focus. But static outlines can feel flat and limit creative camera movement. By creating dynamic 3D outlines using a 3D object within After Effects, you gain the freedom to move the camera around the object, adding depth and engagement without juggling multiple image files. This approach elevates your storytelling by making visuals more memorable and easier to follow.
Preparing Your After Effects Project with Element 3D
To start, you’ll need Video Copilot’s Element 3D plugin, which lets you import and manipulate 3D OBJ or C4D files directly inside After Effects. Set up your composition with a background solid and a separate solid layer named for your 3D scene. Apply the Element effect to this layer via Effects > Video Copilot > Element. This setup keeps your 3D content organized and ready for camera interaction.
Importing and Optimizing Your 3D Model
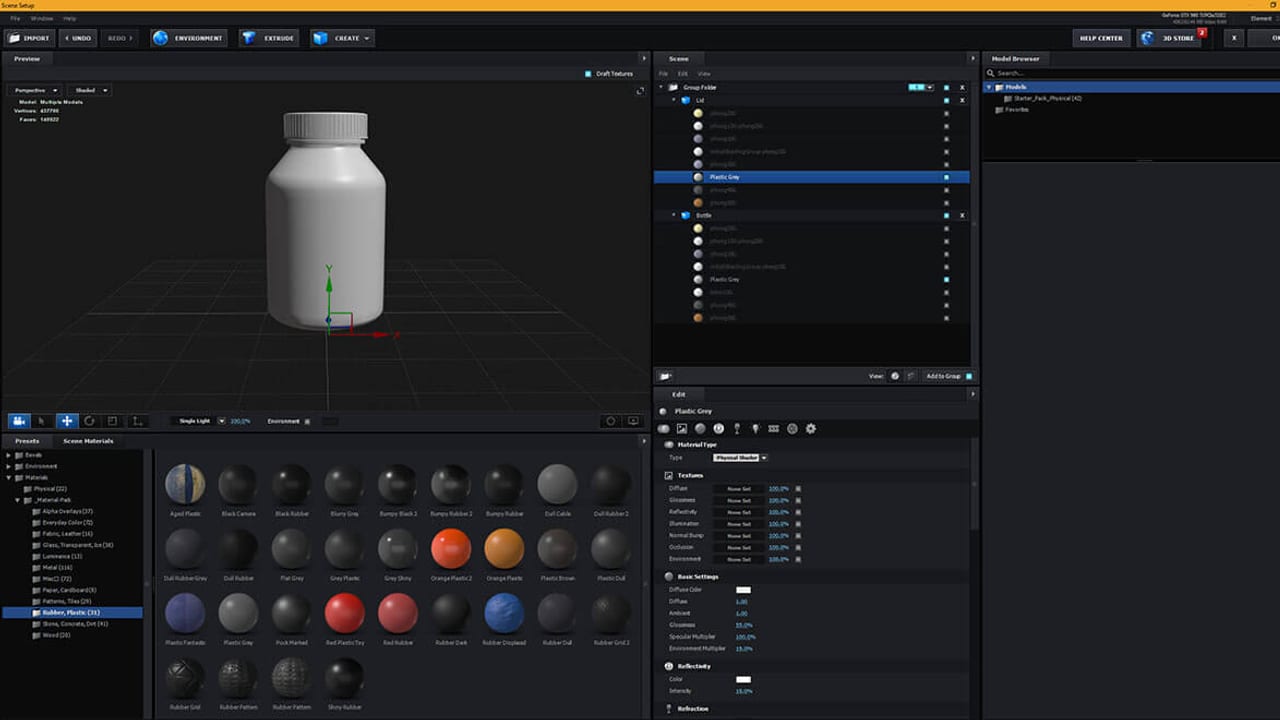
Inside Element 3D’s Scene Setup, import your 3D model file. For best results, assign unique textures to each object or material within your model. This lets you isolate parts for individual styling or effects. Use the Import Preferences to enable 'Use Auto-Normals' to fix shading issues like black or invisible faces. If needed, enable backface rendering to ensure outlines appear correctly from all angles. Element’s material library also offers versatile options to enhance your model’s look.
Creating the Dynamic Outline Effect
Back in After Effects, add a camera layer to your composition to navigate the 3D space interactively. Do not convert the Element layer to a 3D layer; Element manages 3D internally. To create the outline, right-click the Element layer, select Layer Styles > Stroke, and adjust the stroke thickness and color to your preference. To isolate the outline without showing the original object, reduce the Fill Opacity to 0% under Layer Styles > Blending Options > Advanced Blending. This leaves only the stroke visible, creating a clean, dynamic outline that responds to camera movement.
Practical Uses and Next Steps
This dynamic outline technique is ideal for explainer videos, product showcases, and animated infographics where clarity and visual interest are key. It works seamlessly with animated 3D renders that include alpha channels, letting you integrate complex sequences with ease. For producers looking to elevate their motion graphics, combining Element 3D outlines with strategic camera moves and color grading can create premium, engaging content. Explore ECG’s animation and explainer video services to see how this technique fits into broader production workflows.
FAQ
Do I need Element 3D to create dynamic 3D outlines in After Effects?
Yes, Element 3D is essential for importing and manipulating 3D OBJ or C4D files directly inside After Effects, enabling dynamic camera movement around your outlined objects.
Can I use this technique with animated 3D models?
Absolutely. If you have a 3D animated render with an alpha channel, you can import it as an image sequence and apply the same outline method to create dynamic, moving outlines.
How do I fix black or invisible faces on my 3D model in Element 3D?
Enable 'Use Auto-Normals' in the Import Preferences dialog when bringing in your model. If issues persist, turn on backface rendering to ensure all faces are visible from any camera angle.
What should a team understand about After Effects Tutorial: Dynamic 3D Outlines?
The useful takeaway is how audience, creative direction, production choices, post-production, approvals, and delivery needs shape the final video plan.
Where should this kind of project start?
Start with the goal, audience, deadline, where the finished piece needs to live, and the practical constraints that will affect creative and production decisions.
How can ECG help with the next step?
ECG can help connect the creative idea to production planning, filming, post-production, versioning, and delivery so the finished work fits the channel and the audience.